|
|
|
|
|
|
|
|
|
|
|
1957 Chrysler 300C
Page 7
Having new wiring in the car is nice, but it only brings us back to the level of safety they had in 1957.
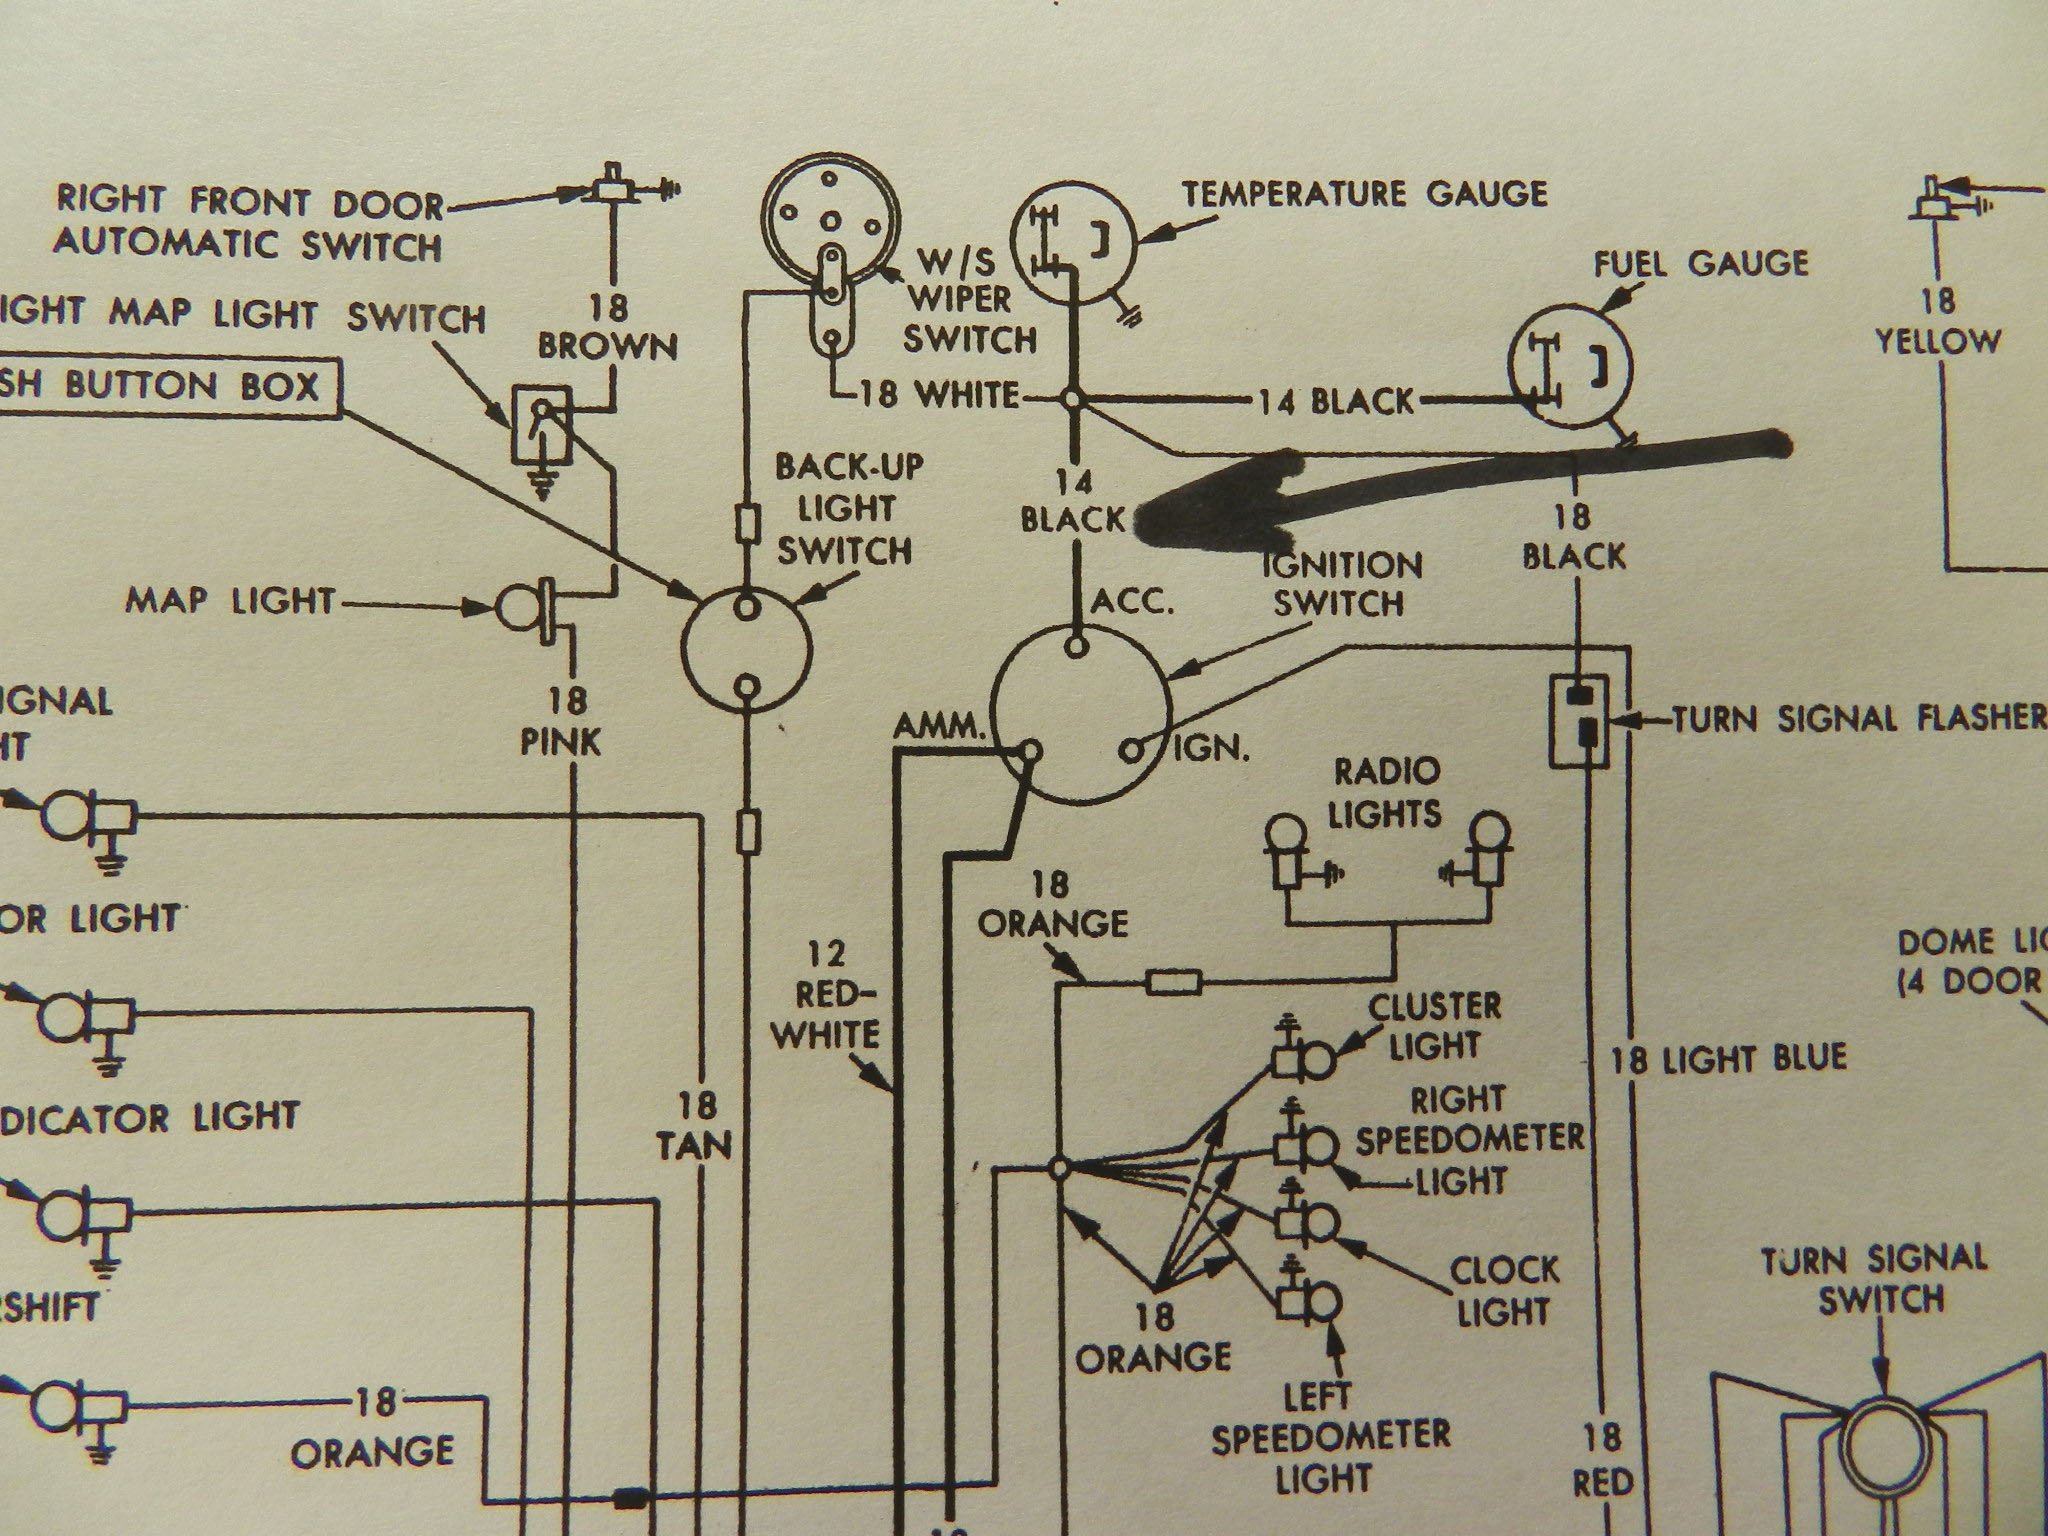
This isn't much. Beyond a circuit breaker for the wiper and one for the headlights, nothing else is fused.
While the in-line fuse is a good idea and easy to do,
should the fuse blow, you won't know which of the downstream components is having a problem. It
would be better to have as many fuses as practical. It might be easy enough to
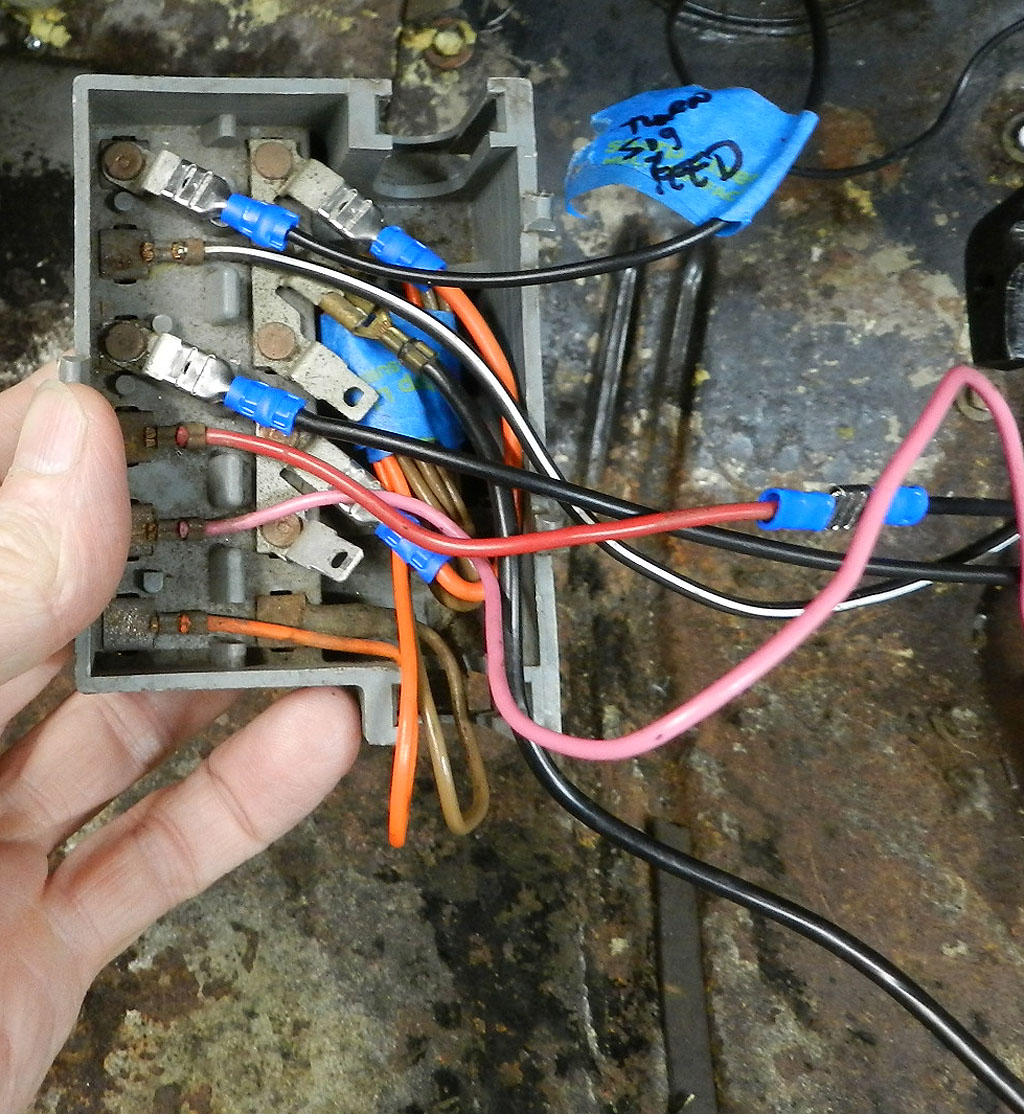
use one of the fuse boxes Chrysler had in the 1960 era cars.
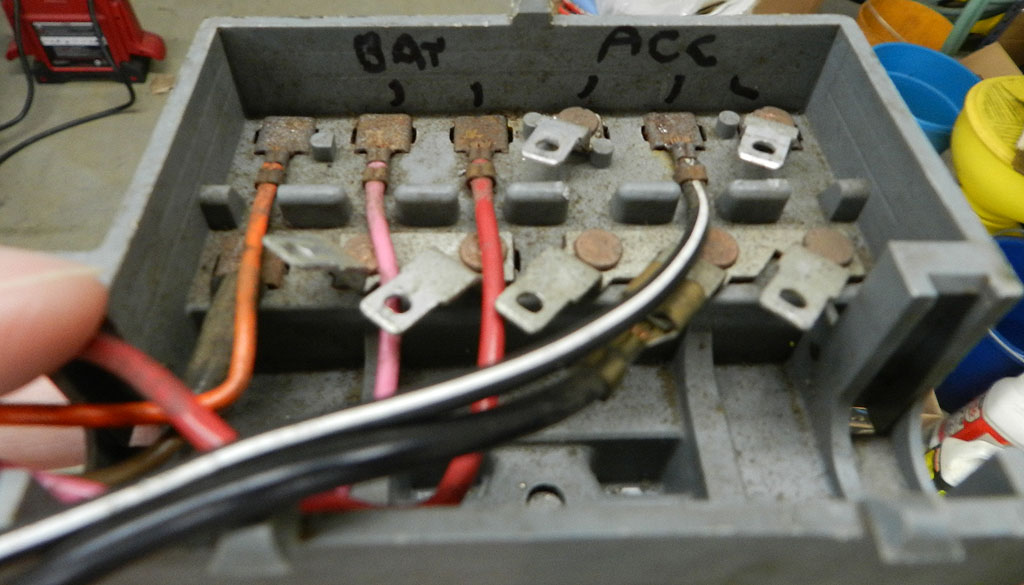
I dug out a fuse box from 1962 and one from 1963. Either could be used. I chose the 1963.
There are two sections in these boxes. One is fed from the battery and is always hot. The other is fed from the ignition and is hot only when the key is on. Such things as headlights, clock, tail lights are available all the time -- they are fed from the battery section. Things such as the heater, radio, wipers and rear defog are "switched accessories" powered only when the key is on and come off of the accessory section.
Below is the fuse box wired for test. It might look like a quagmire, but it really isn't. After testing, I will bundle the wires and tuck the box under the dash. I'll leave enough wire length so the box can be pulled out for inspection in case of a blown fuse. We have a video here.

Wiring completed, we fired it up for the first time in months. We not only get to check the wiring, but also the new oil pump,
heater core and other things. The temperature and fuel gauges responded. I was delighted to see the generator charging. We had great oil pressure but we found a leak on the intake manifold at the exhaust cross over passage. This will take some time to correct. We also noticed that the wrong generator bracket has been installed. This one sits so high it barely clears the hood. I will get a correct bracket. Here is the service manual pages on belt tension for the accessories.
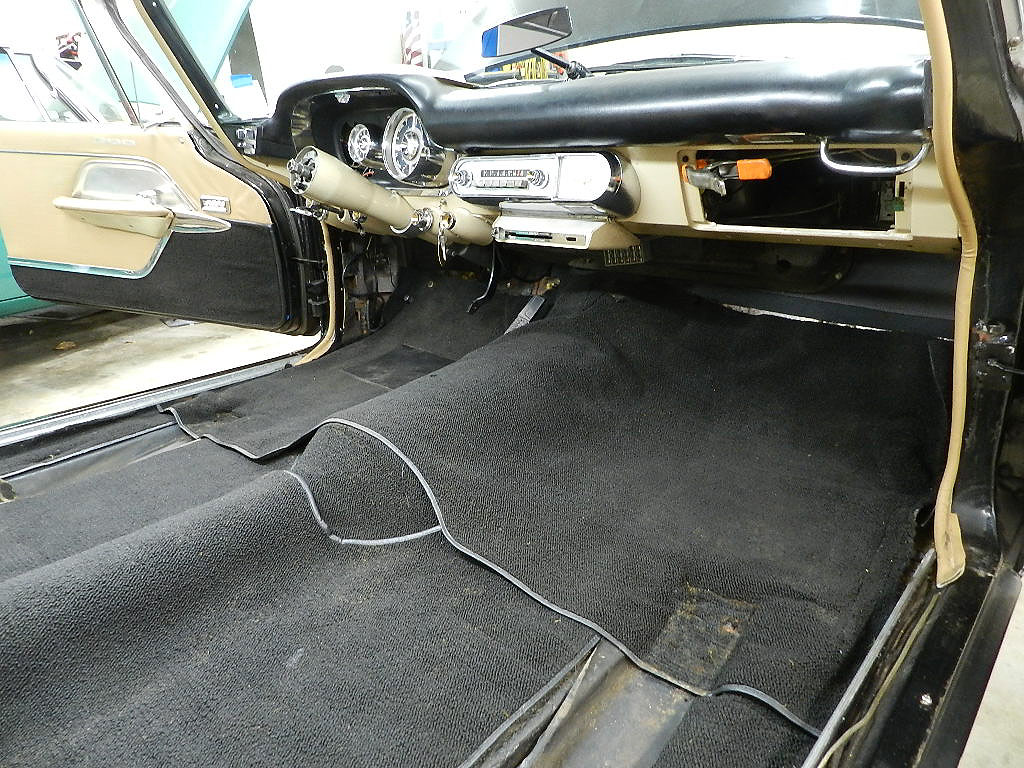
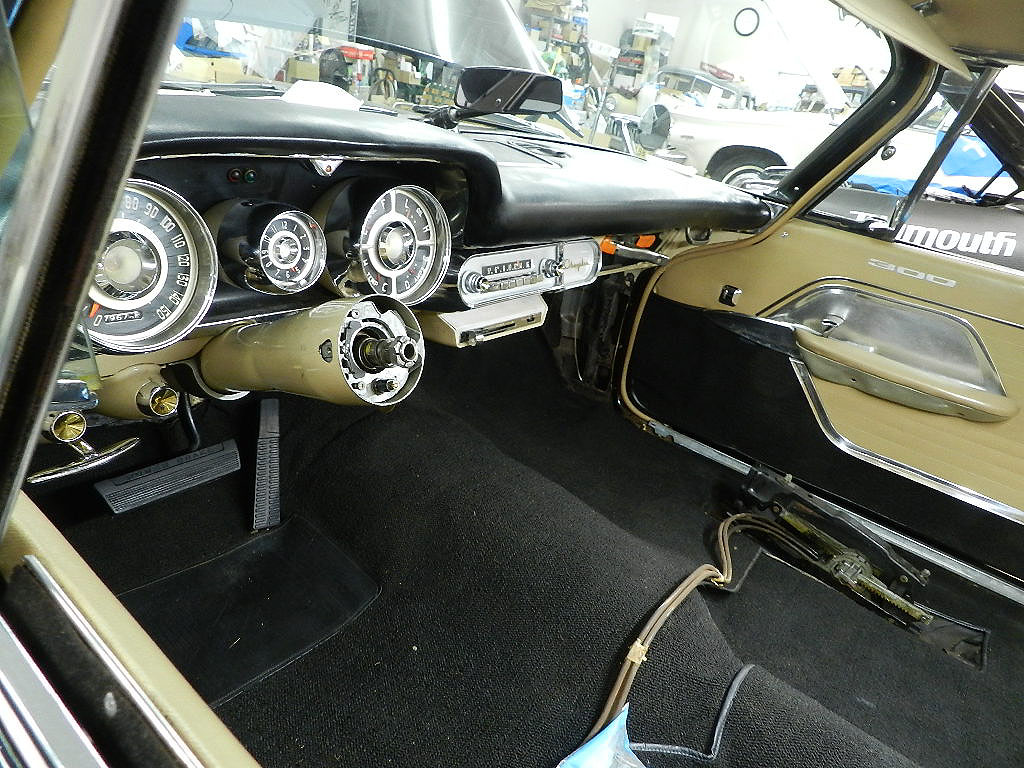
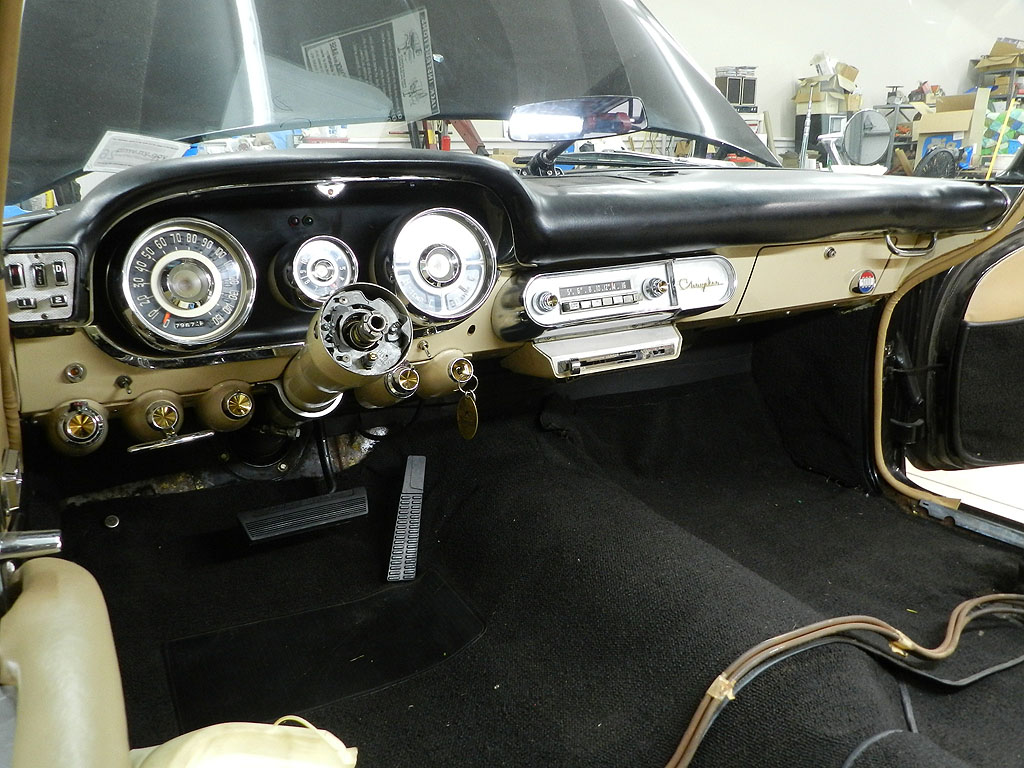
Let's get the interior reassembled. It is easier to install (and remove) the heater control if the radio is not there. I found a correct Bowden cable to replace the missing one and now have the heater valve working. The radio is back in and the dial lights come on with the panel lights. With the gas pedal and brake pedals installed we find the gas pedal linkage is out
of adjustment -- when floored neither secondary comes on. We corrected. The carpet was reinstalled and fits pretty good.
The speedometer went in. Getting those lamps to seat in the speedometer is tough. I had to do it with the speedometer off of the dash so I could get enough leverage.
We finished up the dash with the installation of a glove box and glove box door. The box that came with the car was held together with duct tape. I found an original 57 in good shape and installed it. The original door had holes drilled in it by a previous owner to hold extra ornaments. Murray had an original door in the right color so we swapped that one.
I bought new dome light lenses. You can get them on Ebay from vendors such as Van's or Firestone Collectibles. They all sell
Front Seat Extension page
|
||||||||||||||||||||||