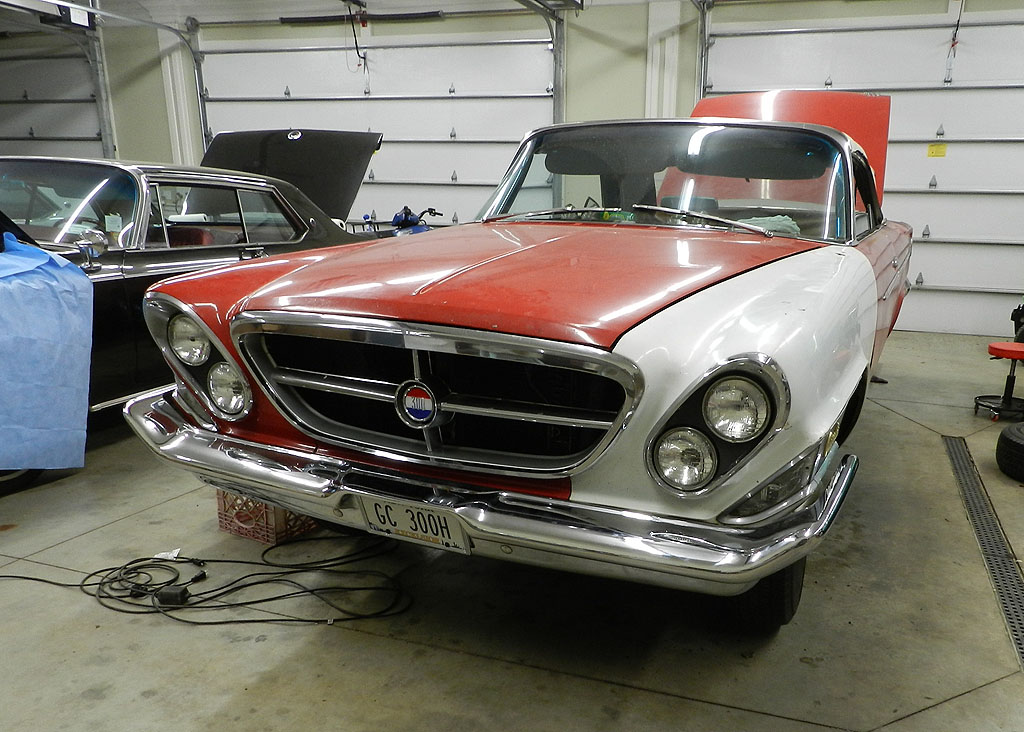
Golden Lion Grrrages
1962 Chrysler 300 H Convertible
Page 4
|
The driver side axle had a leak and it was differential fluid.
We decided to change both rear axle seals (inner). All bearings and races checked good. We repacked bearings, installed new axle seals and reassembled.
Work on the floors is proceeding. We cut the rear floor out of the parts car and brought it over. We also
brought over the driver front fender from the donor car. It is good and solid.
Someday the car will go to the body shop for paint. In the meantime I reassembled
the grille but left the mesh off. That mesh has sharp edges, great for slicing your hands. Installation (and removal) of a 62 grille is difficult
due to access, and 2X as difficult with an AC car. For now it looks fine without the mesh.
I decided to take the buffer and Meguiar's 85 compound to see if the paint would come back. I was nicely surprised when a good bit of depth and luster returned. The paint is far from show quality, but this has been a step in the right direction.
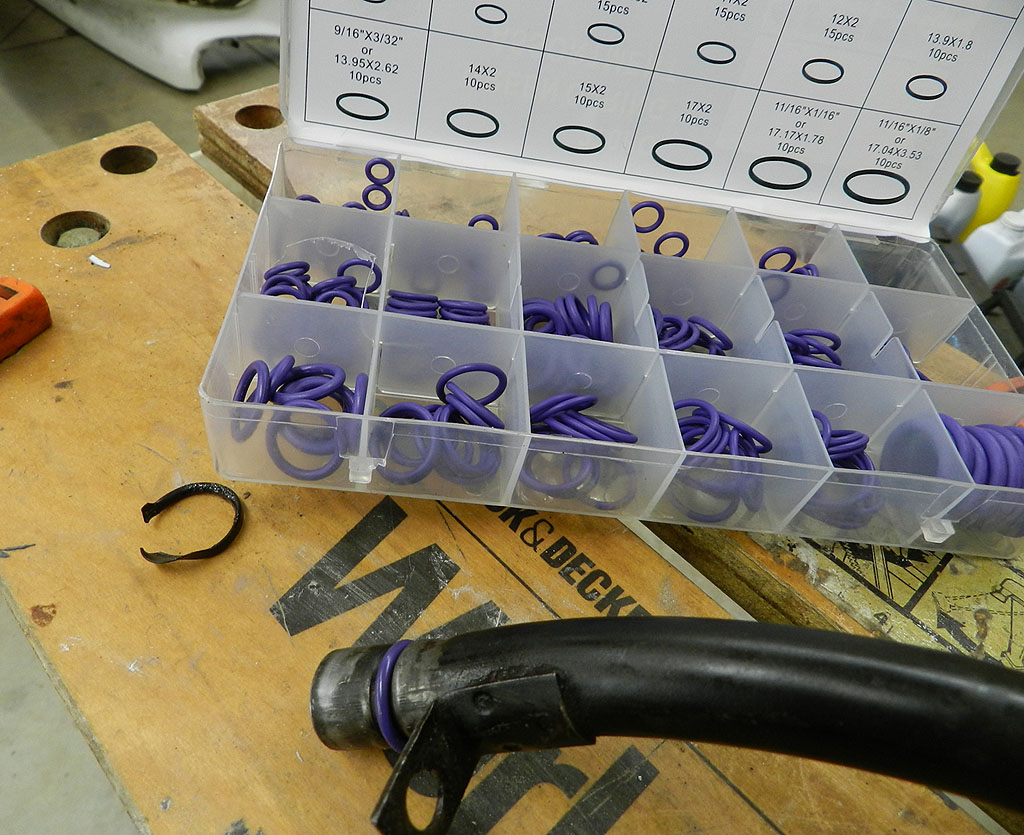
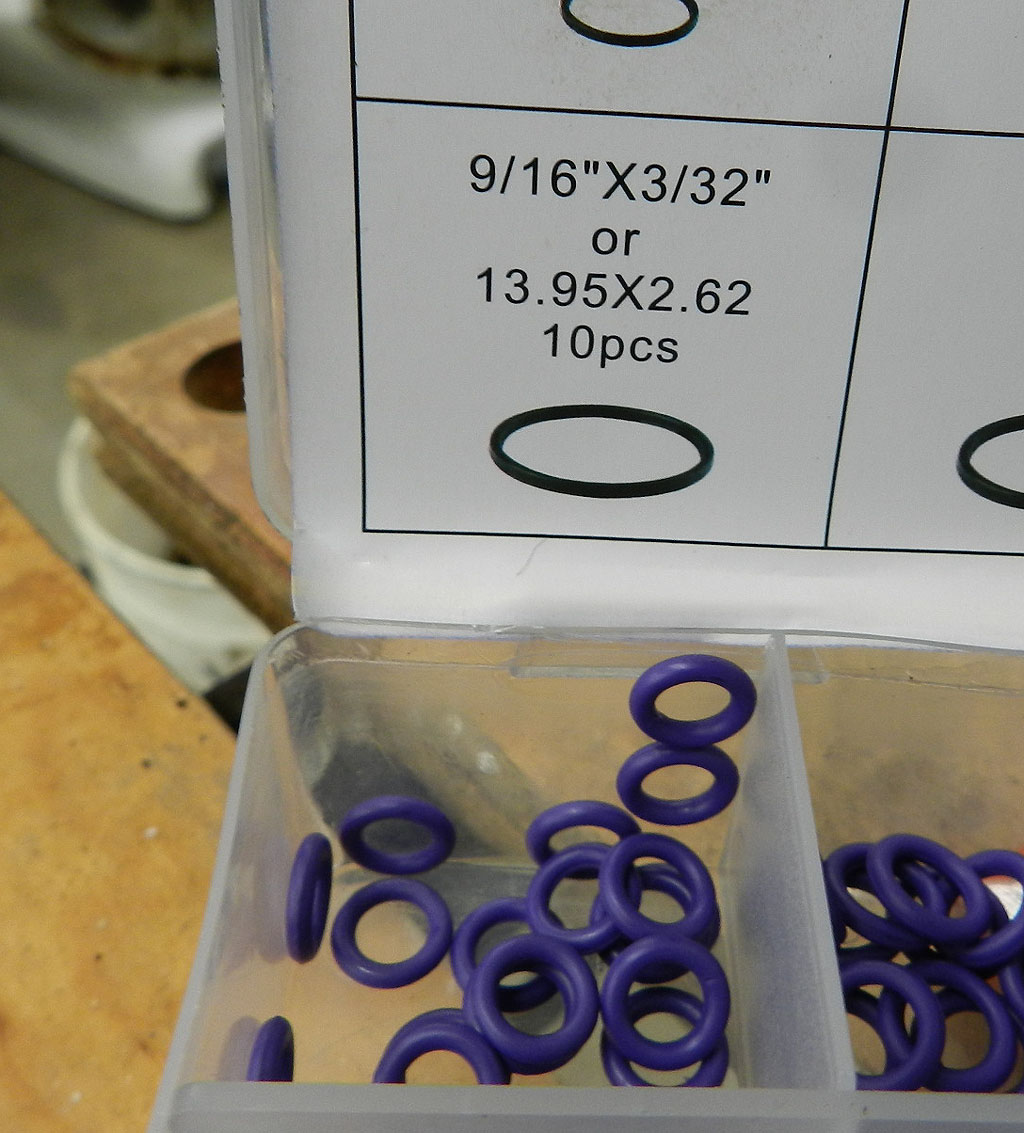
There was a slight leak at the transmission which turned out to the transmission filler tube. I removed it and was
pleased to find the O ring had distorted and was the cause. A new O ring fixed things with the filler tube but the pan still has a small slow leak. We will live with it.
We are getting some warm weather so I can open the garage and run the cars. This is the first run of this car since it came off of the trailer December 4th in 20 degrees with snow, gusting winds and a windchill of 9 degrees. It was not running well.
The choke mechanism isn't working and the plate was tied full open. With a little prime and the choke plate closed, it fired off and ran on all 8. The alternator works, the regulator has the normal Chrysler wild bounce, oil pressure is good and the cooling system works but the heater is not blowing warm. We removed the heater hoses one by one. All hoses flow, the heater core flows but the heater valve does not. It looks like a new valve is needed.
First, we need to flush the heater, the engine, and the radiator so any garbage doesn't ruin the new valve. We used the radiator flush kit and didn't get much dirt or rust out of it. We removed the core plugs and still didn't get much. With the plugs out, the flush kit just runs out the core holes. We flushed again one last time with the engine running -- no change. The water coming out is as clear as the water going in. It looks like we are ready to replace the heater valve.
I've done this job several times. Convertible cars are more difficult because there is a reinforcing beam in the cowl area which limits access to the valve. You need to remove and install the valve by raising the rear as you withdraw. It won't fit if you lower the end, which is the natural action. The valve coming out was an Everhot, not Ranco, and it had a very convenient cable holder. Instead of the Ranco Jesus clip, the Everhot has two discs with a screw to clamp the cable. It is quick and easy, but I don't have spare Everhots and apparently Everhots can not be rebuilt. So a Ranco is going in.
Installed the capillary, new heater hoses, replaced Corbin clamps with screw clamps, added new antifreeze (with rad hose off to vent) and the system checks clean and green to minus 35 degrees. A good days work. It turns out the Everco valve was a non AC valve and I put a non AC valve back in.
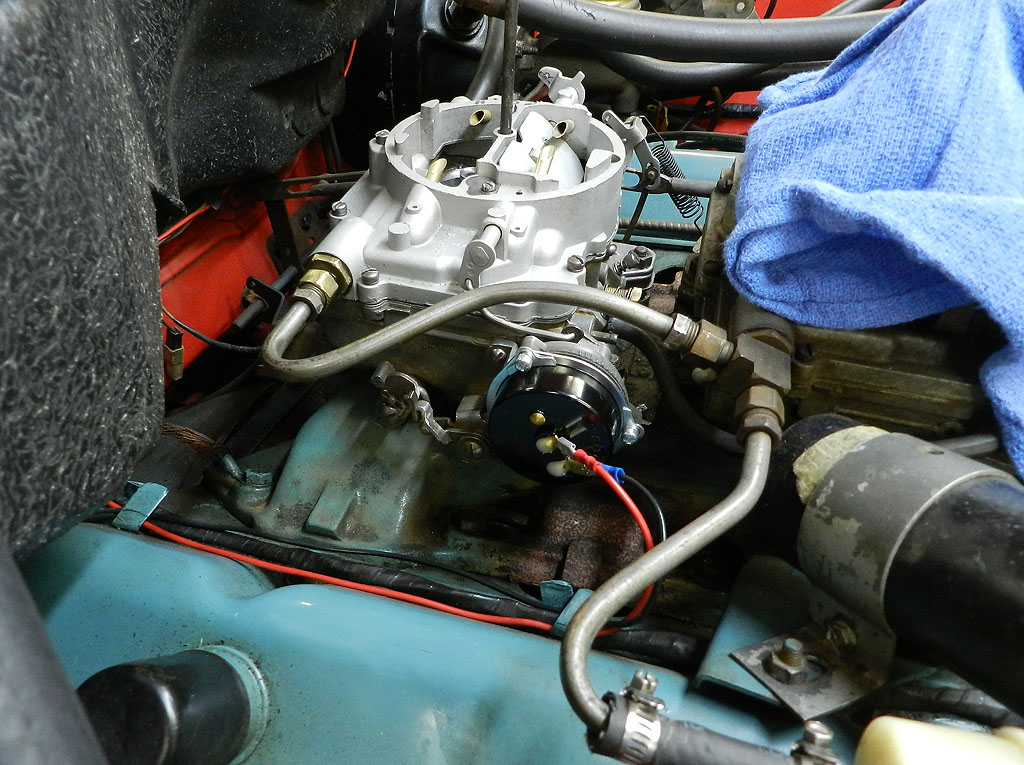
I started the car to circulate the new antifreeze and the rear carb spilled gas everywhere, as if
the float was stuck. I removed the carb and there were issues. The top of the airhorn where the
choke rod passes has been broken on both ends, the choke is not correct and not working -- the
heat tube from the exhaust is missing. Disassembly of the carb showed wear issues I have
never seen before; both primary venturi vent pipes are worn (one much worse than the other) and
the secondary shaft has worn through the casting. This carb would have been worn beyond repair except I happened to have a spare H rear carb.
I noticed Gil had the wrong carb top -- the choke terminal was wrong. The parts carb had the H top so I
installed new needles and seats in that one. I adjusted the floats using the chart in the FSM. The back carb float is 7/32 (.218"), the front carb is 9/32 (.281"). I use drill bits as a gauge -- more accurate than the paper gauges that come in the kits.

I tested the wear holes in the secondary shaft base and found they leak. Since this vacuum leak is likely
to mess with carb calibration, I sealed the holes. JB Weld did the trick.
Did you know that the primary and secondary venturis are stamped with part numbers? The numbers are small and
hard to read, but where you can, a fella should replace a venturi with one with the same part number. I was lucky my
parts carb had good primaries and correct part numbers.
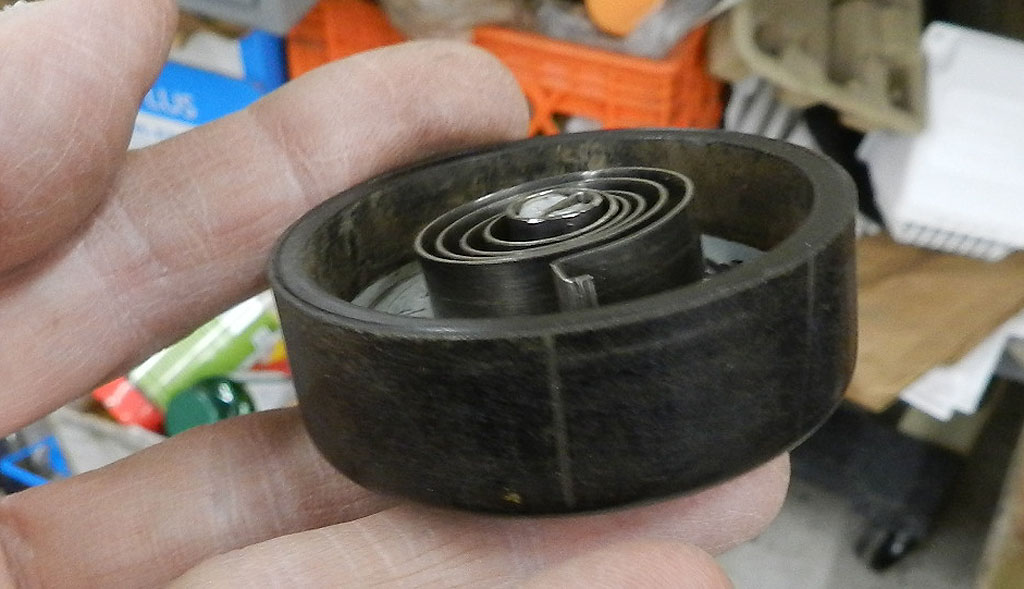
The choke on these in line dual 4 bbl carburetors is a throw-back to the system they were
using in the 50s. A black Bakelite housing is attached to the side of the carb body. A "stove pipe"
directs heat from the exhaust manifold to the housing. Inside the housing are two things: there is a
bimetal spring that sees the exhaust heat, and there is a piston operated by engine vacuum to act
as a choke pull-off. New assemblies are available from Mancini,
their part number MREHF6847.
If you have these chokes apart, it is possible to reassemble the bimetal spring in the wrong position.
On these dual in-line carb setups, only the rear carburetor has a choke.
This car had the wrong choke housing, was missing the heat tube, and
the exhaust manifold was blocked off. The easiest solution to restore an operating choke is to
fit an electric choke kit.
This kit was less than $50. The electric portion fit right on, the wiring was straight forward
(one wire to ground, one wire from switched ignition). I had some twin connectors that allowed an easy
connection at the ballast resistor.
Now that the weather is warm, we can start to evaluate the engine. I pulled the plugs, they were
not good. I also did a compression test.

|

|
|
1
|
125
|
|
2
|
120
|
|
3
|
120
|
|
4
|
125
|
|
5
|
125
|
|
6
|
125
|
|
7
|
100
|
|
8
|
100
|
|
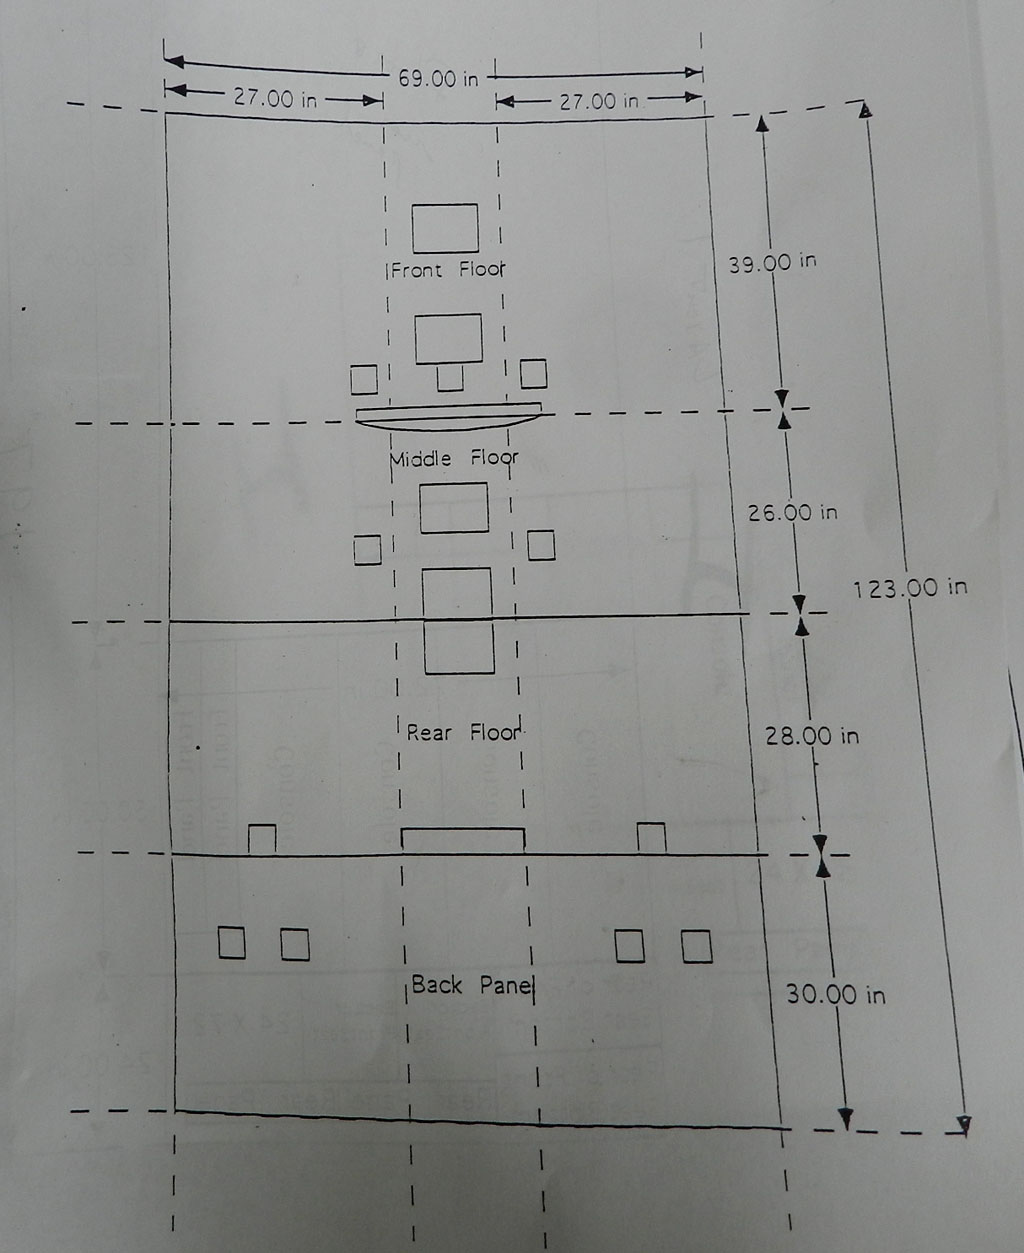
The carpet in these F G H cars -- The F and G
use black carpet, the H uses gold. The club (George Riehl, Ken Mack, Michael Burke) researched this subject
in 1995. While the G carpet has a pile height of
.375" and was available anywhere, the black F carpet has a different pile (.500")
and could not be found. The H carpet is a .375" pile but the color was
unique and could not be found. So the club took on
a project to have F and H carpet custom made. We had a batch made and sold
kits through the club store. 34 F kits were sold with the last one being
sold in 2002. 16 H kits were made, the last sold in 1999.
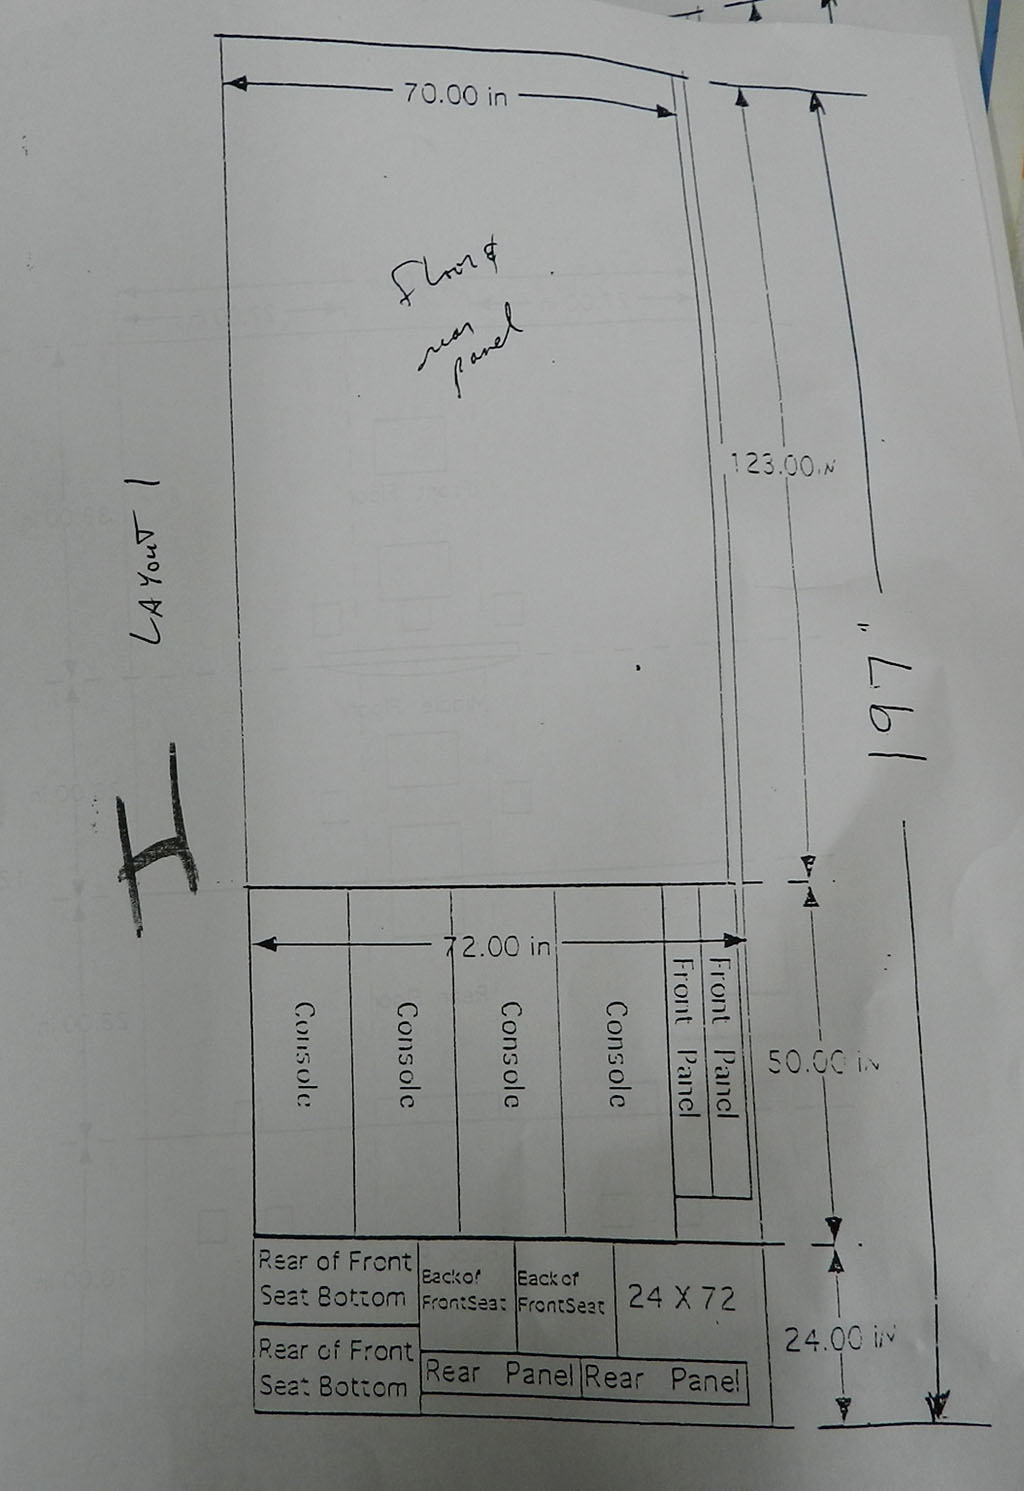 Each F kit consisted
of 5 yards of 72" wide material. The H kit was 5.5 yards; slightly more because the front seat
backs also needed material.
A layout was provided to show how the kit
could be cut into parts. A while after the last kits were sold, we approached
the manufacturer for another production run. They would not make another and no
other sources were found.
Each F kit consisted
of 5 yards of 72" wide material. The H kit was 5.5 yards; slightly more because the front seat
backs also needed material.
A layout was provided to show how the kit
could be cut into parts. A while after the last kits were sold, we approached
the manufacturer for another production run. They would not make another and no
other sources were found.
I bought several carpet kits back then and still had one I could use on
this car. I recently learned that Quirey has the F G H carpet sets available. The Quirey carpets are
cut and sewn. I have to think it is much easier to buy their kit than the way I am doing it from 72" yardage.
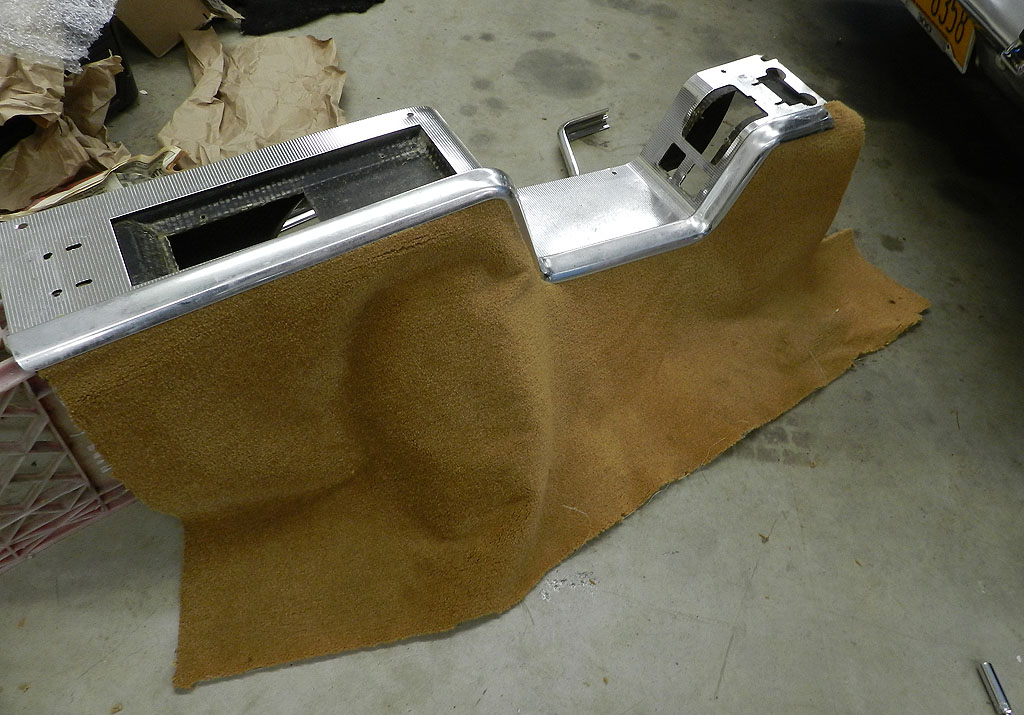
Let's see what we can do to carpet the consoles. I came across a front and rear
console out of an H that still had original carpets I could use for templates.
I had a spare F console with carpet and found there is a difference in the carpet
cut at the front end. The H uses a piece with snaps whereas the F and G use carpet.
I decided to start on the rear console first. I cut blanks and tried assembly. I thought I
could lay the carpet and the top trim with its 5 bolts would capture and retain.
There is no way to align the carpet with each of those 5 bolts and align the bolts in their
rails. I glued the carpet to the console at the top, punched holes in it for the 5 bolts and let
it sit. Then I wrestled the top trim on with the 5 bolts. Once done, it did a very good job of
capturing the carpet.
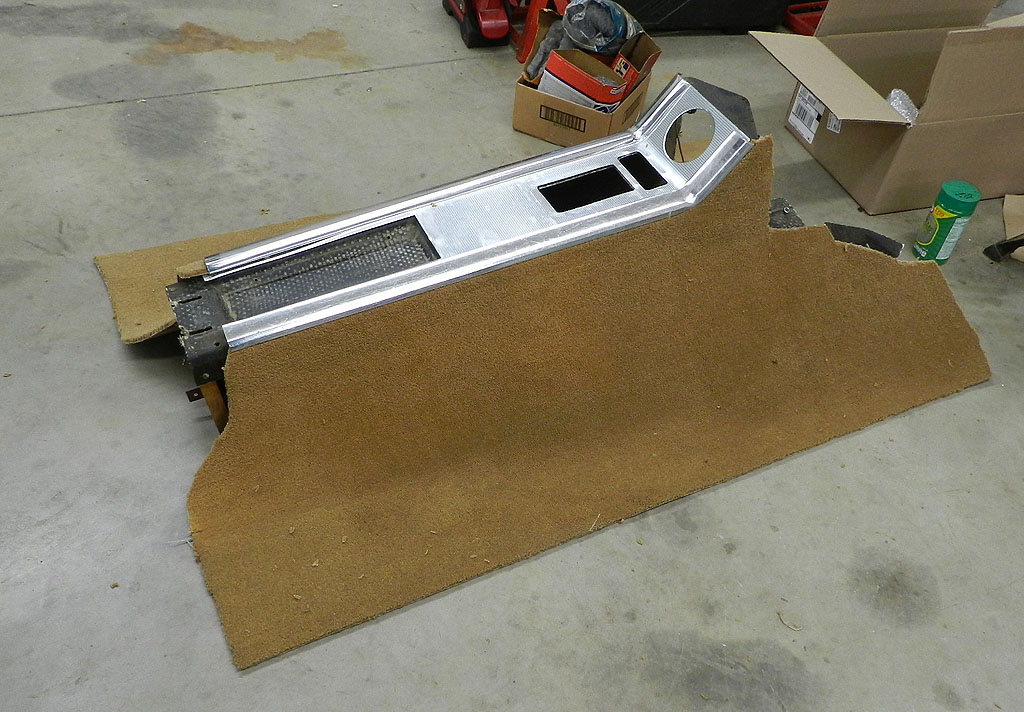
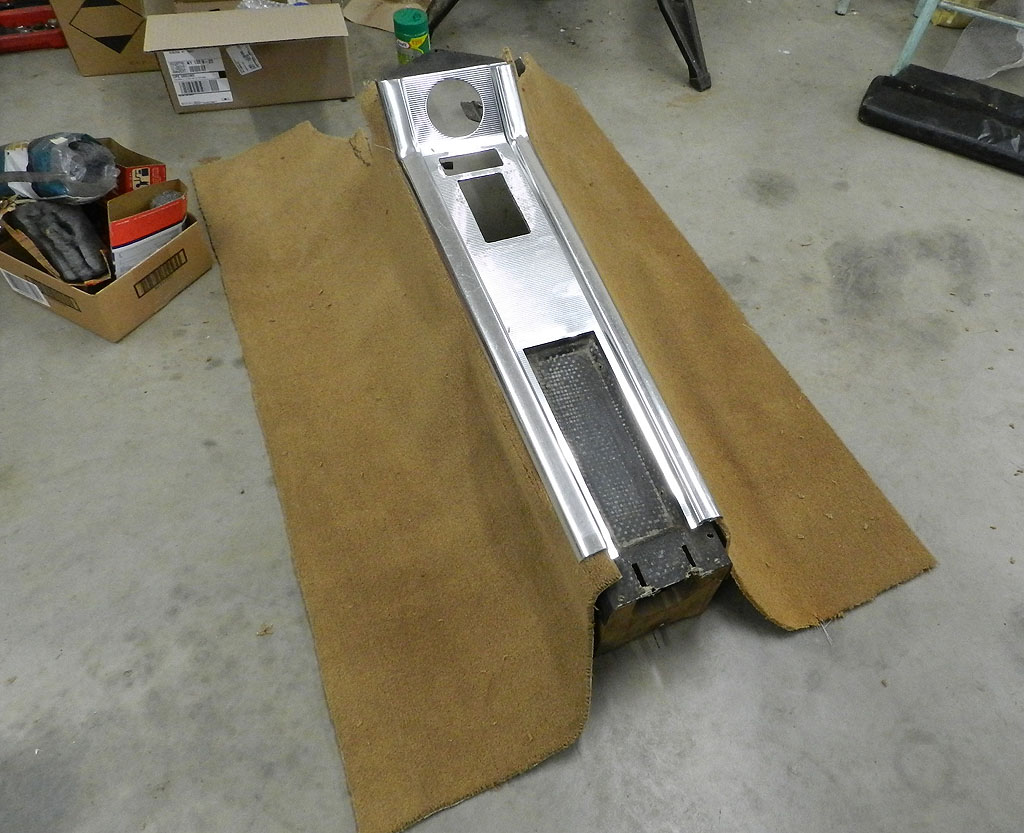
The front console carpet is much easier. There is only 4 bolts and the trim does not have the center dip
that the rear has. I ended up using no glue. Just installed all 4 bolts on the top trim holder
super loose so I had max space and then wiggled carpet into it. Tightened the bolts to clamp down and
the carpet is secure.
Back
|
|