|
|
|
|
|
|
|
|
|
|
|
1957 Chrysler 300C
Page 6
We have the power window motor project completed so I thought I would take a quick minute and wash the windows. How big of a job can that be? Well, it turns out there was black over-spray paint on most of the outside surfaces from a careless painter. The job grew 4X. Mineral spirits was needed to remove the over spray, alcohol needed to remove the mineral spirits, Windex to remove the alcohol. But the glass was still not clean. I remembered the hint to use a micro fiber cloth and dang to daisies that did the deep cleaning. I hope I remember micro fiber for the future.
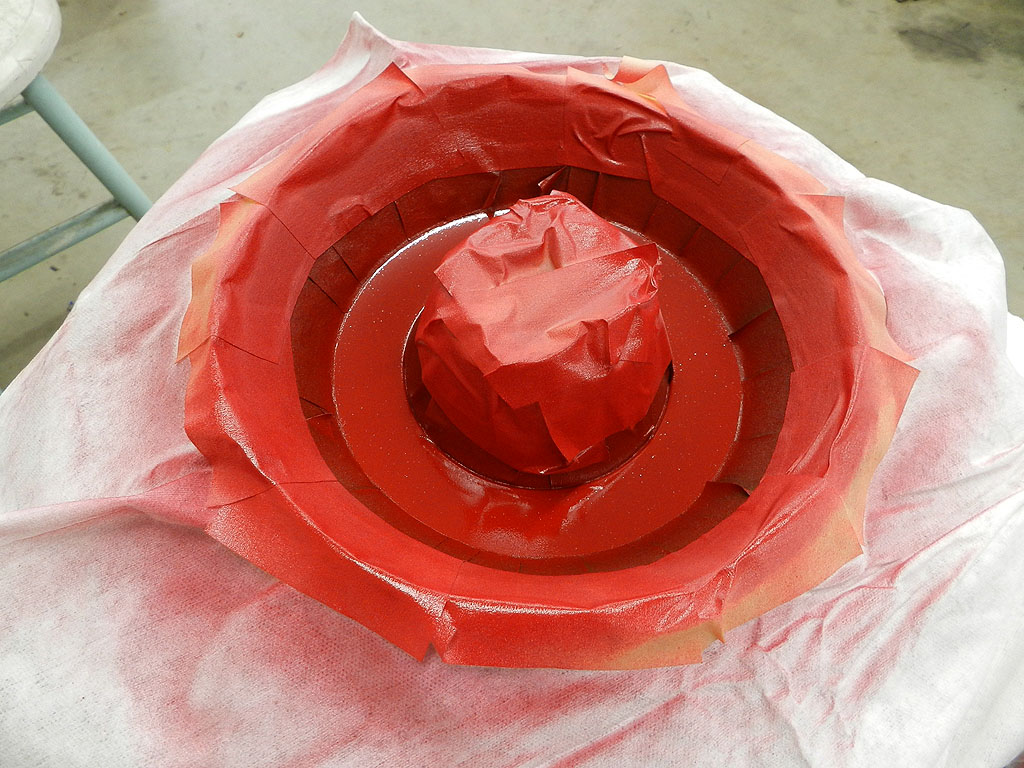
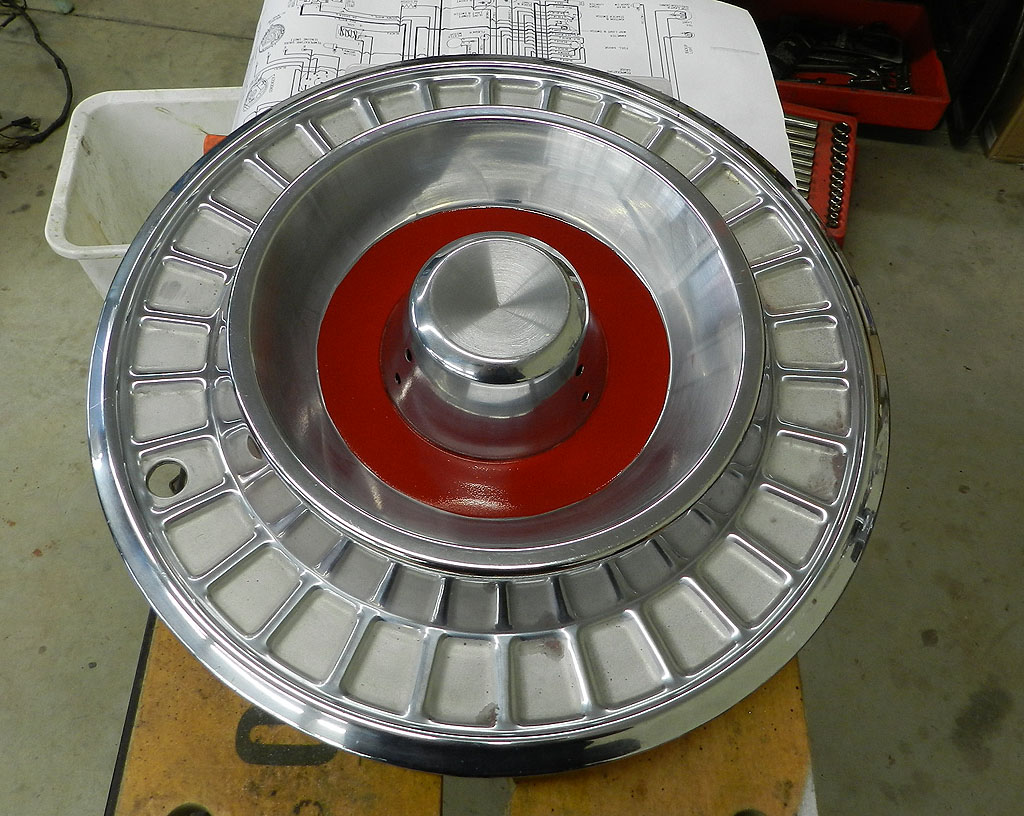
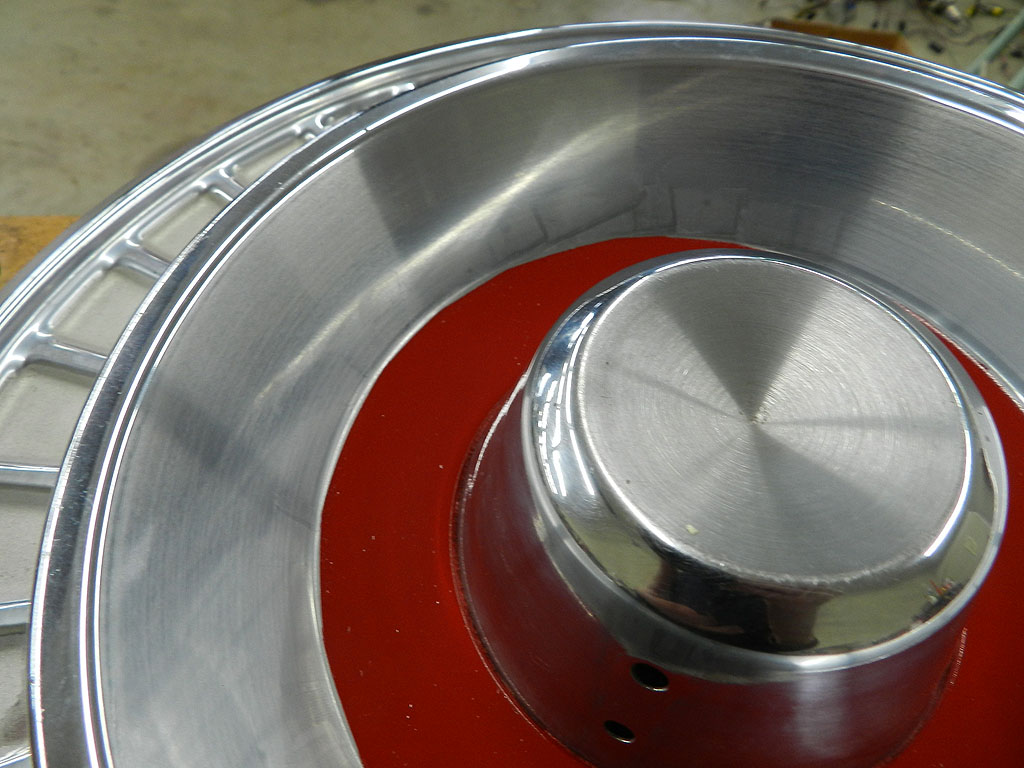
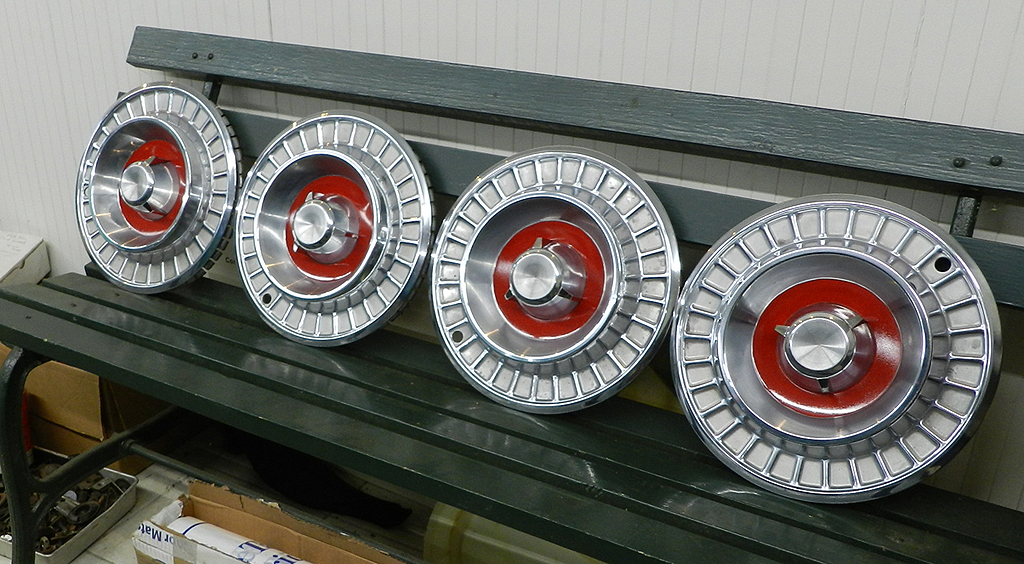
Back to these doggone wheel covers and painting the red center disc. I tried the usual masking and was not satisfied with the result on the outer edge. With the taper of the wheelcover in that area, the masking tape must wrinkle and you don't get a crisp edge. So I started fresh and had the idea, why not get a red decal disc made? That would have a nice crisp edge. But right off the bat I noticed the disc surface is not flat and expected the decal would have to wrinkle on installation. I got out my ancient mechanical drawing tools (1940 era) and cut paper samples. Sure enough, they wrinkle. The decal idea is out.
I'd like to see an original wheel cover with original paint to see the crispness of the outer edge. It might tell me how the factory did it. In any case, I made a mask out of tag stock which covered from the outer edge of the painted section to the rim with another circular piece cut to meet the disc edge. I was surprised when the force of the paint spray from the rattle can was enough to move the mask. The edge was terrible. Forget that one. I went back to masking the disc area with painters masking tape. I used short sections with overlap. The edge was OK and the OD was reasonably uniform. Then I tried vinyl masking tape, the kind they use for pin striping. This is stretchable and conforms to irregular shapes. The results are better than painters tape. Getting the OD perfect requires practice and talent when applying the tape. I spent 30 minutes on each masking and reached the "Pretty Darn Good" level. I will leave this project there. By the way, there is this ad from 1957 and the wheel centers are not red. I have to say, it looks good that way too. A fella could leave them unpainted and forget all this masking. Here is the video on the wheelcovers. 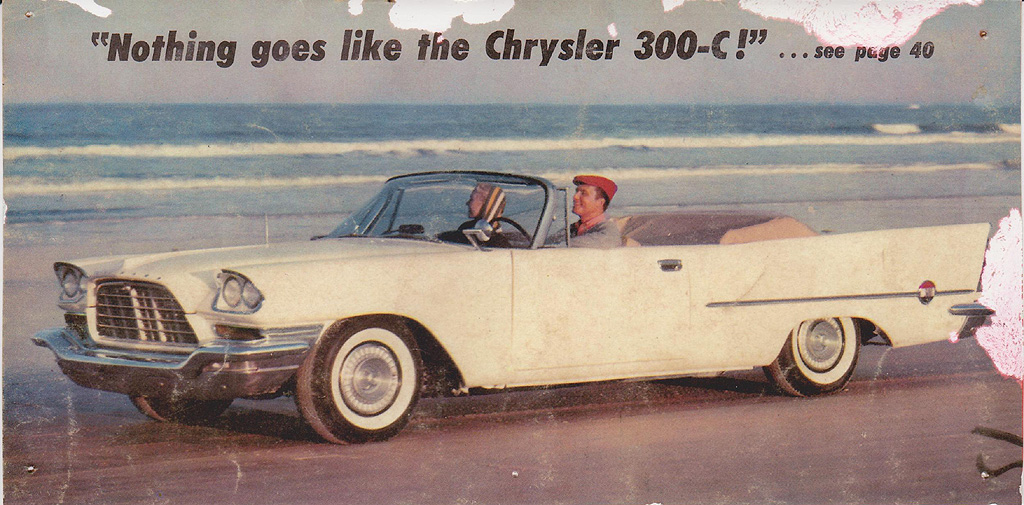
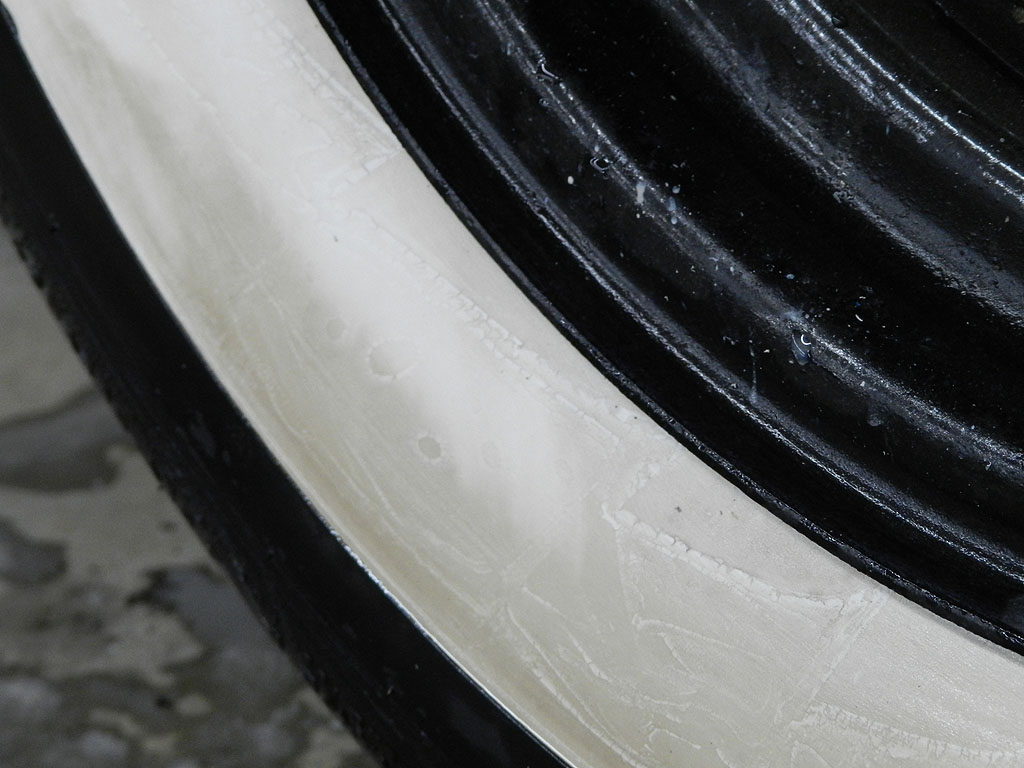
Moved on to getting the coating off of the white wall tires. Bleche white still has no effect. Someone suggested using a pressure washer. I did. It didn't do a thing. I worked with increasingly aggressive Scotch Brite. Progress was slow and not the best. It is unbelievable how difficult it is to get these new white walls clean! More to do.
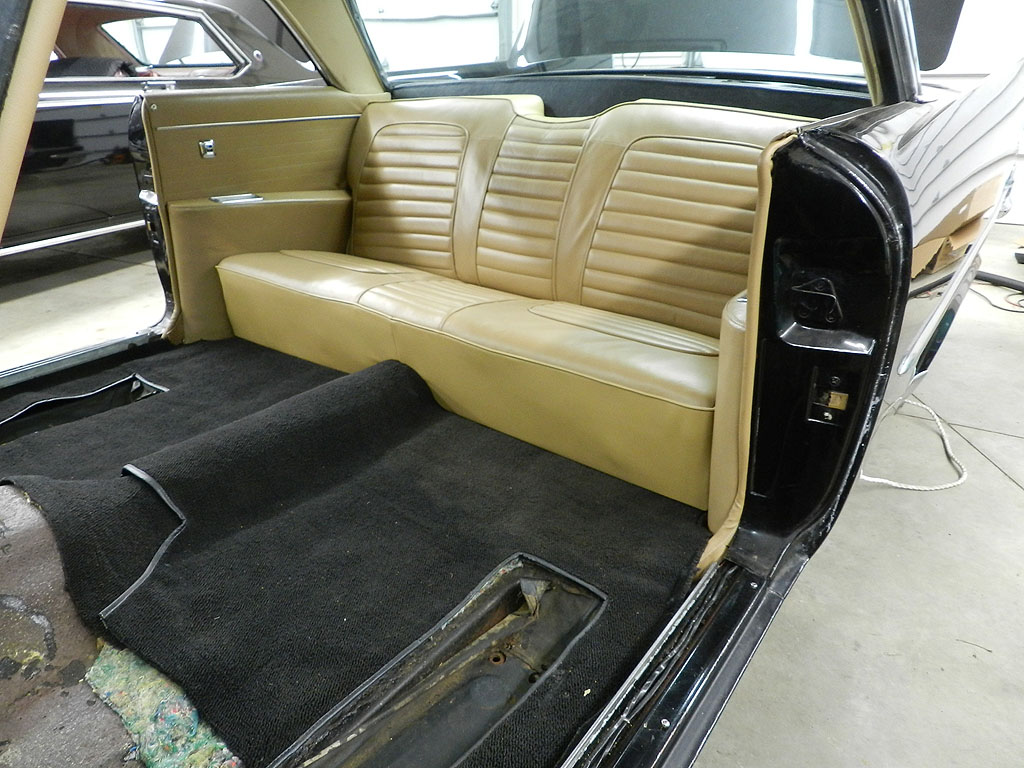
The package shelf arrived from Quirey. At first I thought it was too wide. The trick is to remove both the
right and left interior quarter panels. Even though they look like they don't take up much space, they do.
Arc the package shelf at the center and you can install the edges under the rear window gasket. This car
also had the rear speaker and rear window defog option. I installed the shelf and located the cutouts from
below for best alignment. By the way, I hear SMS also makes rear package shelves, and they will make them
to a custom width if need be.
Let's jump into the new wiring. I have the rear harness installed. It came from YnZ. The front
harness came from Rhode Island Wiring. YnZ has the front harness but their
price is much higher than RI. Still, the YnZ harness is much better than Rhode Island
(correct size terminals and fixtures, all wires labeled).

Some of the original Bakelite connectors too brittle to use. The light socket for the steering wheel map light supplied by RI is too small and I had to reuse the original. I also found a broken wire on the starter switch on the back of the pushbutton assembly. This repair required removal of the transmission push button assembly. After removing some dash chrome and the lower housing, the assembly can be coaxed out of the front far enough to access the two 5/32"(?) bolts holding the cable retainer. With the assembly free, I could see the switch is not removable; it is riveted to the case. I was able to solder a new wire and tested the switch for operation. Might as well paint the push buttons. I used Testors again and this time I had some super fine tip brushes. The assembly went back in and tested fine.
We should also now install the wiper motor and arms thinking we need to know where they are so we can route the new wires to safe locations. The wiper feed wire runs from a circuit breaker located on the top mount stud of the gauge cluster. I expect that breaker will be difficult to install. I hot wired the wiper and checked the arms for clearance with the new wires. All
Before the dash wires get congested, I tested power antenna switch and up is up, down is down. Installed the dash gauge assy next. Because the wires are not long enough, you have to install gauge in the dash then run wires. The temperature gauge sender wire is tough to connect because of access.
Installed the new positive battery terminal and solenoid wire. The engine cranks with the N button. Moved on to heater wiring and discovered the heater switch, the blower motor, and the wiring are different AC to nonAC cars. AC cars have a 3 position blower switch (non AC have 2). AC cars have 4 wires to the motor, nonAC have 3 and the shape of the connector at the motor is different.
On a roll I reinstalled the heater box. This required taking off the distributor cap and the rear air cleaner. The driver side valve cover is still off, so the heater box went right in. The driver side valve cover has the coil mount on it and won't let the heater box be removed or installed, so it has to be off. Heater box in, we reinstalled the driver side valve cover. We had to remove the master cylinder brake light switch for it to wiggle into place; still not an easy job. Reinstalled spark plug tubes and wires. Reinstalled lower rear seat cushion and rear carpet. Time for a test fire. A bit of prime to the rear carb and she fired. These adventures are here.
Back |